 There are many situations in which a mother may need to pump milk from her breasts. Some are short term – for example, occasional separations; mother on medication incompatible with breastfeeding; breast engorgement; severe nipple soreness; or increasing milk supply. Some are long term: a premature or hospitalized infant, or regular separations such as those encountered with returning to work or school. Whatever your reasons for expressing your milk, certain tools and techniques can help you be successful in obtaining the milk you need and maintaining your milk supply.
First, you need to decide if you even need a pump. Some mothers don’t. Moms have been hand expressing their breast milk for millions of years, long before breast pumps were invented. However, most moms do decide to use pumps at some point, if so it’s important to get one that meets your individual needs.
Choosing a pump is an important decision, and one that can be complicated. When you start shopping around for a breast pump, you’ll run across stuff like: “360 degree massage techniques”; “LED screen and digital display and memory”; “flex-shield with aerola stimulator”; “colorful and sexy bustiers”; “Customized Audio Recording Experience”; ‘”LCD screen that serves as a nightlight and memory panel”; and (my personal favorite), “Tone-on-Tone Ultra Suede and Pebbled Faux Leather Brushed Nickel Detail with Kiwi Pick-Stitch Trimming Wrapped Handles”.
Wow. I have no idea what “Kiwi Pick-Stitch Trimming” is, or what it has to do with breast pumps, but it sounds really cool. However, there are so many choices that it can be confusing and overwhelming to a new mom.
For occasional short term separations (such as a weekly evening out), hand expression or a manual pump may be all you need. I think every nursing mother should learn the technique of hand expression, because it can come in handy on so many occasions. You may need to soften your areola (the dark area around the nipple) before the baby nurses to make it easier for him to latch on, you may want to express a little milk in the shower if your breasts are uncomfortably full, or you have a plugged duct, or you many want to express a little milk directly into your baby’s cereal bowl once he starts solids.
There are many occasions when you just want to get out a little milk but not empty the whole breast, and at these times you may not need to use a pump at all. This is the basic technique for hand expression:
- Wash your hands before you start.
- Express into any clean container – bottle, cup, bowl, etc. You don’t need to boil it, just wash with hot soapy water or run it through the dishwasher. Don’t touch the inner surface after you clean it.
- The key to any kind of milk expression is to get the milk to ‘let-down’. Electric pumps stimulate the let-down reflex automatically by mimicking the baby’s sucking action, but when you are hand expressing or using a manual pump, you may need to stimulate the let down reflex yourself. Some women’s milk lets down easily, but many mothers have to work at it.
To help your milk let down, try:
- Looking at a picture of your baby
- Smelling and holding a blanket or piece of clothing that smells like him
- Massaging your breasts, gently rolling the nipple between your fingers
- Taking a hot bath or shower before expressing, applying warm compresses to the breast, or expressing while you are in the tub
- Drink a glass of water or juice before starting to express.
- Anything that helps you relax will help your milk let down. This can include settling into a comfortable spot, listening to music, taking deep breaths, having your partner rub your shoulders, etc. Some mothers report that the first few times they pump, they are nervous and don’t get much of a let down, but after they get into the routine, they find that their milk is leaking out as soon as they look at their baby’s picture or hear the sound of the pump motor if they are using an electric pump.
Back to hand expression techniques:
- Hold your breast with one or both hands depending on the size, with the thumb on top and the fingers underneath. Gently compress the tissue between the fingers and thumbs while rolling them forward, rotating around the breast. Or, use the tips of your fingers to massage in small circles all around the breast, similar to a breast exam. You can also do this type of massage, also called breast compression, while you are expressing to encourage the flow of milk.
- As the milk begins to flow, you may feel a distinct feeling of heaviness or tingling as the milk begins to spray or drip out. Some mothers never feel a distinct sensation when their milk lets down, while for others it is strong enough to be almost painful. Some mothers don’t feel the sensation in the early days of nursing, but will feel it later on. As long as your baby is sucking and swallowing, you know your milk is letting down. You will also experience milk leaking from the other breast as it lets down on one side. This is normal, as your milk always lets down on both sides at once (your body doesn’t know you’re not nursing twins!)
- Another sign that your milk is letting down is ‘afterpains’, which are abdominal pains similar to menstrual cramps. These cramps are caused by the release of the hormone oxytocin. The same hormone that makes your milk let down also causes your uterus to contract. The afterpains may be mild or severe, and are usually stronger in women who have had children before than in first time mothers. The uterine cramping, while not pleasant, is a sign that your uterus is contracting and returning to its pre-pregnant state. This occurs faster in nursing mothers than in formula feeding mothers – another benefit of of breastfeeding. Your uterus will continue to shrink for about six weeks, but the afterpains are usually only uncomfortable for the first few days after birth. Don’t be surprised if the cramping is much stronger while your baby nurses – that’s a sign that your milk is letting down effectively. You may also experience increased bloody discharge (lochia) during the first few days after birth while your uterus is contracting, especially during nursing when your milk lets down.
- Place the container under the breast and lean over it. Grasp the areola by putting your thumb on the top and your forefinger on the bottom. Press the breast tissue back toward your chest and squeeze your thumb and finger together, rotating forward, just behind the areola. Do this a few times, then move the fingers half an inch to the left or right and compress again. Continue rotating around the areola until you reach all around the breast. You may want to use your other hand to alternate massaging and compressing.
- Another method is to hold the breast with your thumb on the top of the areola, and the other four fingers cupping the breast from underneath, with your little finger touching your rib cage. To start expressing, begin a wave-like motion by pushing your little finger gently into the breast, followed by the fourth, third, then index finger while you compress the tissue with your thumb from above. Rotate until all areas of the breast are compressed.
- With both these techniques, repeat the procedure on the other breast once you have rotated all around the first breast. You may want to alternate breasts more than once, which encourages multiple let downs.
While there is always some milk in your breasts, it is easiest to hand express when your breasts are full, especially in the morning. The techniques described above may sound complicated, but they really aren’t once you practice a little. Some mothers are very successful at manual expression, but others find it frustrating and tiring. It is generally not a good method to use on a regular basis, or to use to collect milk left after feedings when the breast is relatively empty. It usually takes at least 20-30 minutes to empty the breast with hand expression or manual pumping. Here is a video that shows how to hand express your milk: http://www.youtube.com/watch?v=Tuhuekl-3JY
Healthy babies need no food other than mom’s milk for at least the first 6 months of life, as recommended by the AAP (American Academy of Pediatrics), but that doesn’t mean that nursing moms have to be on call 24 hours a day for all those months. Collecting your own milk and feeding your baby, or having someone else feed him a bottle, is an option that nearly all mothers use at one time or another.
Although there is nothing more efficient at removing milk as a newborn’s suckling, pumping is not as intimidating as it seems. The nursing mom has many options to allow her to express and store her milk so that her baby can experience the benefits of breast milk even when they are separated.
For occasional short term separations, like a weekly evening out, hand expression or a manual pump may be all you need. I often talk to mothers who are trying to use hand expression or manual pumps and they say things like, “I sat there for half an hour, and only got one ounce of milk. What’s wrong with me?” The answer is “nothing”. The problem is that they are only getting out the small amount of foremilk that collects between feedings, but aren’t getting their milk to let down. If the milk is not letting down, you will see drops of milk slowly dripping out, but not spraying or spurting out. If you are pumping and only getting drops (and this applies no matter what type of pump you are using), stop and go back to the suggestions above to get your milk to let down. Continuing to pump or express while only getting drops will just frustrate you and make you tense, making it less likely that your milk will let down and flow freely.
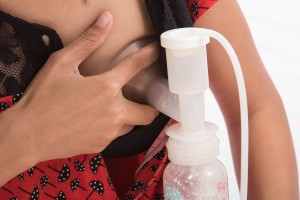
Manual pumps are portable and relatively inexpensive, usually costing less than $50.00. They are fine for occasional use, or for the mother who has an abundant milk supply and an efficient let down reflex. They work by creating a vacuum that creates pressure which causes milk to flow from an area of high pressure in the breast to an area of low pressure in the pump. They don’t cycle automatically, and can be tiring to the mother’s arm or hands. It is important to remember that no breast pump is as efficient as the baby at removing milk, and manual pumps are generally less effective than electric ones.
The Haakaa is a relatively new one piece “milk collection device” made out of flexible silicone. It’s not like other breast pumps. You attach it to one breast while you’re nursing on the other side. When your milk let’s down, the suction gently pulls the milk out, catching the extra milk that drips out, without draining the breast completely. The Haakaa is a good option for breastfeeding moms who don’t want to use an electric pump on a regular basic, and it has the advantages of being expensive, portable, and extra easy to use.
Regardless of what type of pump you’re using, make sure that the flange (the funnel shaped part) of the pump fits correctly. Some pump flanges come with adapters that fit inside to adjust for different sized breasts and nipples. The nipple and areola should be surrounded by the flange. The flange should not extend way past the areola, and the areola should not extend way past the flange. If the flange fits correctly, part of the areola and all of the nipple should slip comfortably and easily into it. If the flange isn’t the right size, it can cause nipple soreness.
When you are ready to start pumping, moisten the flange with water, (or you may want to use a few drops of olive oil), and center the nipple in the flange. Follow the instructions on the pump, because the technique will differ depending on which type of pump you are using. If the pump has an adjustable vacuum, start out on minimum and increase as your milk starts flowing. Most pumps will give the better results on the higher suction settings, but if your nipples are sore or your breasts are tender due to engorgement or mastitis, keep the pump set on the lower setting until your milk lets down. Some mothers get better results with medium suction levels and higher cycling speeds. You will have to experiment to see what settings work best for you.
Follow the manufacturer’s instructions on cleaning the pump. Only the parts that actually touch the milk need to be cleaned, and usually hot soapy water or running them through the dishwasher is all that is needed, although they can be boiled as well. The earlier suggestions about encouraging let-down and alternating breasts apply to manual as well as hand pumping.
In 2017, after a premature baby died from a rare infection caused by contaminated pump parts, the CDC issued new guidelines for cleaning breast pump parts. In addition to recommending that you wash the parts as soon as possible after each use, they also suggest that you disassemble the pump parts before cleaning; use a separate dish pan and brush for washing (not the kitchen sink); don’t leave parts in the water to soak; air dry and store pump pieces in a clean sealed container (like Tupperware or Ziploc bag); and use disinfectant wipes on the counter tops where you put your pump before and after you pump.
What you need to remember is that a) the baby who developed this rare infection was a preemie; b) the condition is EXTREMELY rare; c) the CDC is always going to err on the side of caution when it comes to disease control; and d) if you are pumping at work in a setting where multiple people will be spreading germs, you are going to want to be more careful about cleaning parts than you would be at home in your kitchen.
For most moms of healthy full term babies, following the CDC guidelines more or less isn’t that hard. For moms who are pumping multiple times a day or pumping at work, it helps to buy several sets of pump parts. After using one set, put the parts in a Ziploc bag in the fridge until you have time to wash them thoroughly. Extra steps like air drying completely or using disinfectant wipes are optional.
There are a number of electric pumps on the market, and some are much better than others. In general, the mid-range electric pumps are not nearly as effective as the high end professional grade pumps. Because of their relatively low cost ( $200.00 or less), these are big sellers in the department and baby stores. Many people buy them without realizing that there are tremendous differences in electric pumps. Anyone who has told you that she tried an electric pump and it didn’t work, or it hurt, was probably talking about one of the low range models rather than the more expensive hospital or professional grade models.
Some of the problems with these less expensive pumps (besides the fact that many of them just don’t work well and some mothers say they cause sore nipples) are the fact that they are sometimes noisy, and the motor may not last as long as the more expensive pumps, which are designed for more frequent and long term use.
Since babies suck about once every second, ideally a pump should cycle between 40 and 65 times every minute. Some of the less expensive pumps will only cycle 10-20 times per minute. Because this is still not as many cycles per minute as a baby generates, these pumps are only recommended for occasional use. If you are a stay at home mom, and want to pump every now and then so you can have relief bottles, this may be the right pump for you.
Don’t be surprised if you get more milk from one breast than the other when you double pump, because each breast functions independently of the other. Some mothers will get 3 or 4 times as much from one breast as the other, and some will notice only a subtle difference in the amount they get from each side. It would be unusual for each breast to produce exactly the same amount.
If you are going to be pumping frequently or are returning to work, you really need to be double pumping with a more efficient (and more expensive) professional or top end pump. Double pumping is an important feature. Not only does it cut your pumping time in half (from 20-30 minutes with single pumping to 10-15 minutes or less), but your prolaction levels are higher when you double pump, so you actually produce more milk in less time.
In situations where you must be separated from your baby for extended periods of time, such as a premature or hospitalized infant, and the only stimulation your breasts will receive is from the pump, it is best to use a hospital grade pump. This type of pump is much heavier than other pumps, but they provide the best possible stimulation for maintaining your milk supply when medically indicated. Hospital grade pumps would cost over $1,000 to purchase, so most mothers rent them. Check with your insurance company to see if they will pay for the rental if it is medically necessary and the baby’s health care provider writes a prescription for it.
One of the provisions of the Affordable Care Act is that insurance companies will be mandated to cover breast pumps and lactation support, so it’s worth checking to see if this will apply to you.
Some states consider hospital grade pumps durable medical equipment and will cover the cost if your doctor deems it medically necessary. Most WIC programs will provide breast pumps if moms meet certain criteria, such as working full-time or having a medical need. Check with your local WIC program to see they have pumps available, and if so, if you qualify.
If you need to rent a hospital grade pump, check with the hospital to find out what your options are. Many hospitals provide hospital grade pumps to use during your hospital stay, and often rent them as well. Many cities also have lactation consultants in private practice in the community who rent pumps and provide other products for nursing mothers. Ask your La Leche League Leader, Midwife, or Childbirth Instructor. They’ll know what’s available in your area. Rental rates for hospital grade pumps vary. Most are around $75.00 a month.
Purchasing a top end professional grade pump is an excellent choice for mothers who want convenience, portability, and efficiency. It may seem like a lot of money at the time, but it’s a great investment, especially if you intend to breastfeed long-term or are planning to have more children.
There are many different choices of manual, small electric pumps (mid range) or professional grade pumps (top end) available to purchase. Some offer alternative power options like battery power and car adapters.
There are several websites that offer the option of comparing an assortment of different types of pumps. There are several companies who make breast pumps, including Ameda, Medela, Hygeia, Simplesse, and Lansinoh. The pump that seems to be most popular with moms is the Spectra.
Read the customer reviews, and choose the pump that seems right for your needs and your budget. If you are going back to work, I strongly suggest that you invest in a good professional top end pump. It may seem like a lot of money, but the $200-300 you spend on a good pump will save you a lot of time and frustration in the long run, and will be well worth the money.
Guidelines for Storing Human Milk (These guidelines apply to milk that will be given to healthy, full-term babies. If you are expressing milk for a sick or premature baby, check with your doctor or hospital staff regarding collecting, handling, and storing your milk).
Containers
You have several options for storing your milk. Breast milk can be safely stored in glass or hard plastic bottles with tight fitting lids, or bags especially designed for storing breast milk.
Avoid any containers not made with the controversial chemical bisphenol A (BPA), an estrogen-mimicking industrial chemical. In 2012, the FDA mandated that baby bottles and children’s drinking cups could no longer contain BPA.
Bags made especially for storing breast milk are designed to protect the nutrients and anti-infective qualities of human milk. They are thicker than the bottle liners sold for use with disposable bottle systems, which may split during freezing and may cause a decrease in the antibodies and fat which adhere to the sides of the bags. Bags take up less room in your freezer than bottles, and the milk thaws faster than milk frozen in hard containers. Since some of the white blood cells in human milk is destroyed by freezing, it makes sense to refrigerate milk whenever you will be using it within eight days. Remember that formula doesn’t have any live cells to begin with, so frozen breast milk is still better for your baby than formula.
You may want to freeze some of your milk in ice cube trays. Clean the tray first with hot soapy water and air dry, then cover with plastic wrap til frozen. Each cube is about an ounce, so you can pop out as many ounces as you want and put them into freezer bags. It’s always good to have some smaller amounts on hand for snack or cereal feedings, or so you can offer an extra ounce or two if your baby finishes one bottle and is still hungry. You can also buy special ice cube trays for storing milk that come with covers to seal the top tightly.
When storing milk in bottles, wash them in hot soapy water and air dry. Choose a top that fits well. You can boil them if you want to, but it isn’t really necessary. Bags made for breast milk storage are sterile and don’t require any preparation before use.
When milk is frozen, it expands, so leave about an inch at the top of the container to allow room for expansion. Put only 2 to 4 ounces of milk in each container, or the amount your baby will take at a single feeding.
Smaller quantities are easier to thaw, and you avoid waste this way. You can add fresh milk to a container of frozen milk as long as there is less fresh milk than frozen. Cool the milk for 30 minutes first. For example, you can add 2 oz. of fresh milk to 4 oz. of frozen, but not 4 oz. of fresh milk to 2 oz. of frozen. You don’t want it to thaw and then refreeze. Label each container with the date it was expressed. If you are taking it to day care, put your baby’s first and last name on the label, using a permanent marker. Since the composition of human milk changes to meet your baby’s needs as he grows, always use the freshest milk possible.
Storage
- Whenever it is possible, give your baby fresh milk that has been refrigerated, not frozen. Freezing kills some of the live cells and antibodies in human milk, but not all of them. Since formula doesn’t have any of these anti-infective properties to begin with, frozen milk is still better for him than formula. If you are planning to use the milk within 8 days, refrigerate it rather than freezing it. Because human milk is a living substance, its antibacterial properties help it stay fresh longer than formula. How long you can store it depends on the temperature.
- Room Temperature is considered between 66°F-72°F/19°C-22°C to 73°F–77°F/23°C–25°C.
- Freshly expressed milk can be stored at room temperature for up to 10 hours, depending on how warm the room is. Colostrum or milk expressed within one week of delivery can be stored for up to 12 hours at room temperature. However, whenever possible, milk should be placed in the refrigerator soon after expressing.
- When a refrigerator isn’t available, put freshly expressed milk in an insulated container with ice packs. It will keep for up to 24 hours.
- Fresh milk can be kept in the refrigerator for at least 8 days. Store it toward the back.
- Milk that has been frozen and then thawed will keep in the refrigerator for around 24 hours.
- Freshly expressed milk can be kept in a self-contained freezer compartment for 3-6 months, depending on how often the door is opened. Store it toward the back.
- Fresh milk can be stored in a separate chest type deep freeze for 6-12 months.
- Never re-freeze milk that has been thawed out. As long as it has ice crystals in it, it’s still considered frozen.
- Label each container with the date, so that you can use the oldest milk first. If your baby will be going to day care, put his first and last name on the label in big letters with a permanent marker.
With all these guidelines, remember that fresh milk which has been stored at room temperature or in a cooler before being placed in the fridge or freezer may not keep as long. That’s why you should always place milk in the fridge as soon as possible after expressing it.
Research indicates that if baby doesn’t finish a bottle of expressed milk that has not been heated, the milk can be kept at room temperature for up to 4 hours, or kept for 24 hours if you put it in the fridge right away. Once the milk has been heated, it can sit at room temperature for up to 2 hours, but then should be discarded. Frozen milk that has been heated and offered to the baby can be refrigerated within 30 minutes and offered again for the next feeding, but discarded after that.
It’s important to keep in mind that human milk is chock full of live immune factors that make it a really bad medium for growing bacteria. In forty years of working with nursing moms and babies, I have NEVER seen a baby get sick from spoiled breast milk. All the storage guidelines err on the side of caution, and there are multiple conflicting sources on the internet that will give you different advice. Of course you don’t want to give your baby spoiled milk, but when it comes to breast milk, if you’re not sure about using it, just smell it. When you have a gallon of milk in your fridge and you aren’t sure if it’s still okay to drink, do the sniff test. If it doesn’t smell spoiled, it’s fine. If you drink cow’s milk that’s a little past its expiration date, it won’t make you sick to drink it if you pour it on your cereal by mistake, but the taste will probably keep you from finishing the bowl.
Breast milk from a healthy mom expressed into a clean container isn’t going to grown killer bacteria while it’s sitting in your fridge. EBM that’s been sitting at room temperature for 5 hours or milk that’s been frozen for 13 months doesn’t have to be tossed. Just use common sense and when in doubt, do the sniff test.
Handling and Thawing
- Human milk may separate into layers of milk and cream during storage. Many mothers take the milk out of the fridge and are shocked when it has separated into layers. I shudder to think of all the perfectly good milk that has been dumped because moms thought it had spoiled. The cream (hindmilk) in human milk rises to the top, just like cow’s milk.
- Breast milk may look bluish, greenish, yellowish, or brownish according to the percentage of foremilk it contains. Foremilk expressed at the beginning of a pumping session may look thinner and bluish, like skim milk. Hindmilk expressed later in the feeding may look thicker or creamier, and have a yellow tint. The yellow tint is especially pronounced during the first week or so of nursing while the milk still contains colostrum.
- Sometimes your milk may smell ‘soapy’ after it is frozen and then thawed. This is due to the breakdown of milk fats that occur during the freezing process. If there is a yucky smell from high lipase (enzyme that breaks down milk fats) activity when the milk has been frozen, it doesn’t mean the milk is bad, or will hurt your baby. Some babies don’t mind the taste, and will drink it anyway. If they balk at the taste, the milk can be heated to scalding (bubbles around the edges, not boiling) after expression, then quickly cooled and frozen. This deactivates the lipase enzyme, gets rid of the taste, and is still better for your baby than formula.
- You can pump directly into refrigerated milk as long as you add the milk within 24 hours of when the original milk was expressed. If milk has been stored at room temperature, you can pump directly into it as long as you do it within 8-10 hours. You then need to use the milk as soon as possible. If you plan to use the milk within 8 days, don’t freeze it. If you do plan to freeze it, do so within 24-48 hours of expressing it. The sooner you freeze it, the better.
- To defrost frozen milk, place it in the fridge the night before you’re going to use it. This takes about 12 hours. If you need to thaw it quickly, run it under warm water, or place it in a bowl of water and replace the cool water with warm, until the milk is defrosted. Don’t use hot water, and NEVER heat it in a microwave. This can destroy the live antibodies in the milk, and may also create ‘hot spots’ than can burn your baby’s mouth, even though the container may not feel hot to the touch. Many babies don’t care if the milk is served cold right out of the fridge. It won’t upset their stomach, and will save you or your caregiver a minute or two, which can be really important if your baby is frantically hungry. If you want to try cold milk, be sure to run the nipple under warm water if it has been refrigerated. Most babies dislike cold nipples more than they dislike cold milk.
- When a refrigerator isn’t available, put the milk in an insulated container with ice packs. It will keep for up to 24 hours.
How Much Milk to Leave for Your Baby
Average intake by age: birth to 2 months: 2-5 ounces per feeding; two to four months: 4-6 ounces per feeding; and from four to six months: 5-7 ounces per feeding. Average intake by weight: The average baby who isn’t eating anything but milk needs about two and a half ounces per pound of weight. As a rule of thumb, leave about one ounce for every hour you’re separated from your baby. Some babies need more, some need less in order to gain weight adequately. A ten pound baby needs about 25 ounces in twenty-four hours (round up an ounce or two to be on the safe side – say 28 ounces), which means that if he eats eight times in 24 hours, he would need a little over 3 ounces at each feeding. You’ll get a feel for how much he will eat at each feeding as he begins to take bottles on a regular basis.
FYI: Human milk is not considered a bio-hazardous body fluid like blood or saliva, and OSHA and the CDC agree that it does not have to be treated as such. For more details on handling breast milk in a work or day care setting, see the article Returning to Work. The article Caregiver’s Guide to the Breastfed Baby gives information on handling human milk that you can share with your baby’s care provider.
Anne Smith, IBCLC
Breastfeeding Basics
Resources
Best Practices for Expressing, Storing and Handling Human Milk, 3rd edition. Jones, F. Raleigh, NC: Human Milk Banking Association of North America, 2011.
Proper Storage and Preparation of Breast Milk; CDC, September 18, 2018
Human Milk Storage Information for Home Use for Full-Term Infants: ABM Clinical Protocol #8; Academy of Breastfeeding Medicine, Revised 2017
Why do milk storage guidelines differ? Nancy Morbacher, IBCLC; October, 2015
To Pump More Milk, Use Hands On Pumping; Nancy Morbacher, IBCLC
Resources: Milk expression tips & pump information https: Kelly Mom, 2018
New CDC Guidelines for Cleaning Breast Pump Parts: Amanda Glenn, Exclusive Pumping, October, 2017
How to Keep Your Breast Pump Kit Clean: Fact Sheet: CDC, 2018
Storage and Handling of Breastmilk: Mother and Child Health; Becky Flora, BSed, IBCLC; 2017
New CDC Guidelines for Cleaning Breast Pump Parts: Amanda Glenn, Exclusive Pumping, October, 2017
Power Pumping
Power Pumping to Increase Milk Supply, Amanda Glenn, Exclusive Pumping, May 2018
9 Things to Know About Power Pumping Before Trying It, Kristina Johnson, March 2017
Power Pumping; Catherine Watson Genna, BS, IBCLC,
(Edited September. 2019)
To help your milk let down, try:
• Looking at a picture of your baby
• Smelling and holding a blanket or piece of his clothing
• Massaging your breasts
• Taking a hot bath or shower before expressing or applying warm compresses
• Drinking a glass of water or juice before starting to express